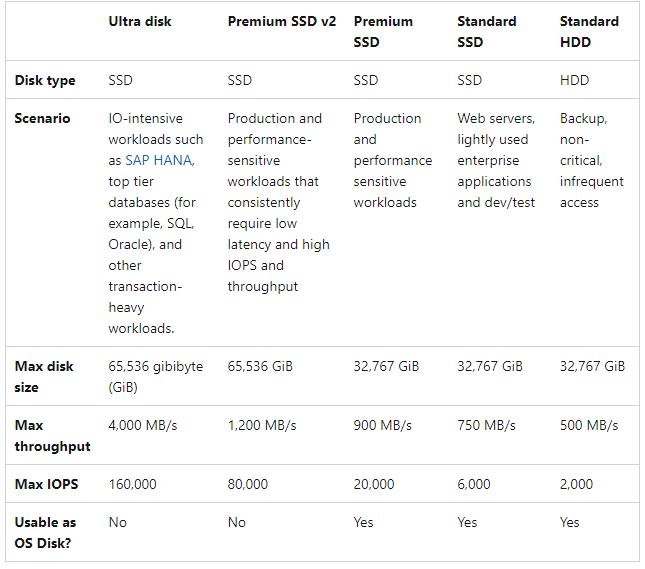
Azure offers five disks types of managed disks that we can choose to deploy a VM as per our business needs, it also provides the option to change from one disk type to another based on your requirements.
Typically we move from Standard to Premium storage to improve the Disk Latency. The below table illustrates the comparison of five Azure Disk types to help you which disk type to use based on the application running on the Azure VM.
Changing the Azure VM's disk type requires you to Stop the VM and then change the disk type.
You can change the disk type by manually powering off the VM and then changing each disk attached to that VM but that's a time and effort-taking process.
Keeping the above thing in mind we came up with a PowerShell script that changes the disk type of an Azure VM by just providing the Disk Type and the name of the Azure VM. One can use this PowerShell script to change Azure Disk type from Premium to Standard or from Standard to Premium.
For the above procedure or the below PowerShell script to work we need managed disks, if our Azure Virtual Machine is running with an unmanaged disk we need to convert them to managed disk first
The script will ask for 2 inputs the disk type that you want your Azure Disk to change to and Azure VM Name and then it will do the rest of the things like stopping the VM, changing all the disks attached to the VM to the disk type provided in the input and then start the VM.


